Category: Blog

Top 5 Injection Molding Defects to Avoid

Top 5 Injection Molding Defects to Avoid

You need to recognize what sorts of value deformities to search for to ensure your item fulfills your client. We should take a gander at the assembling procedure and the infusion forming defects that generally influence these items.

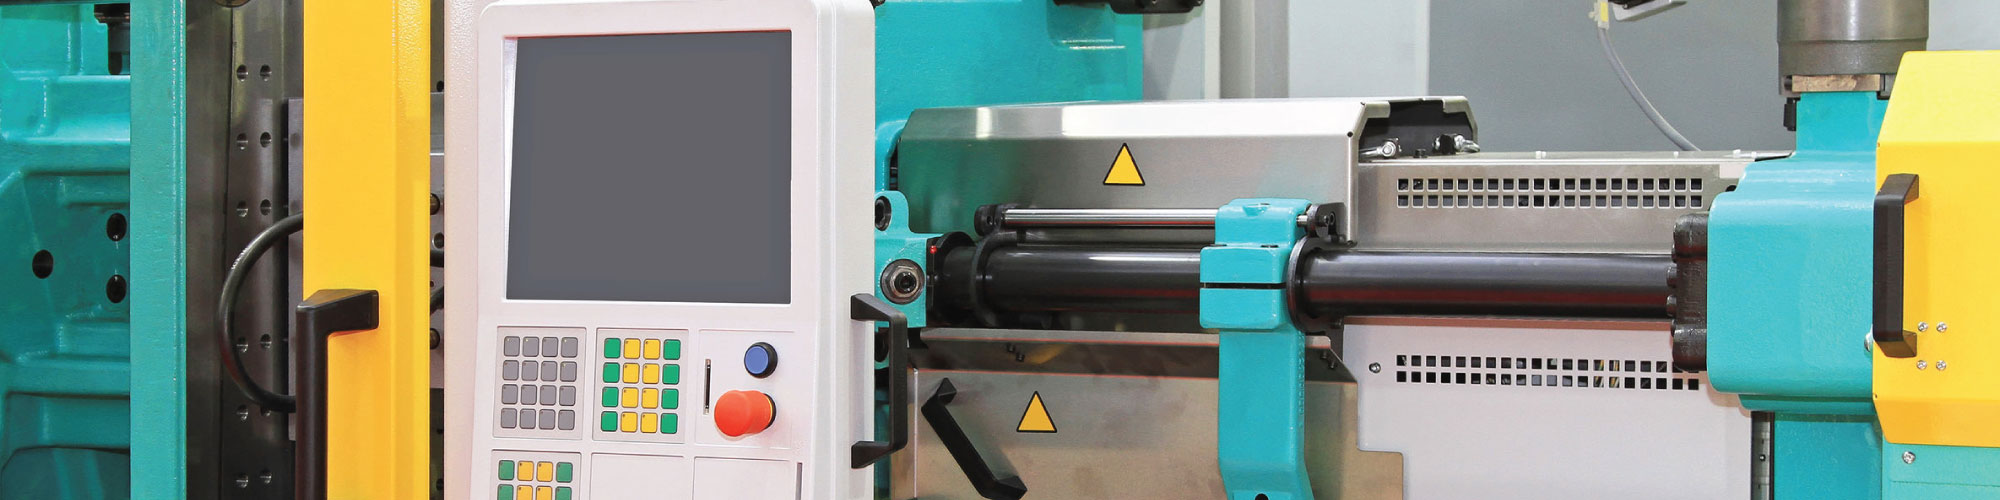
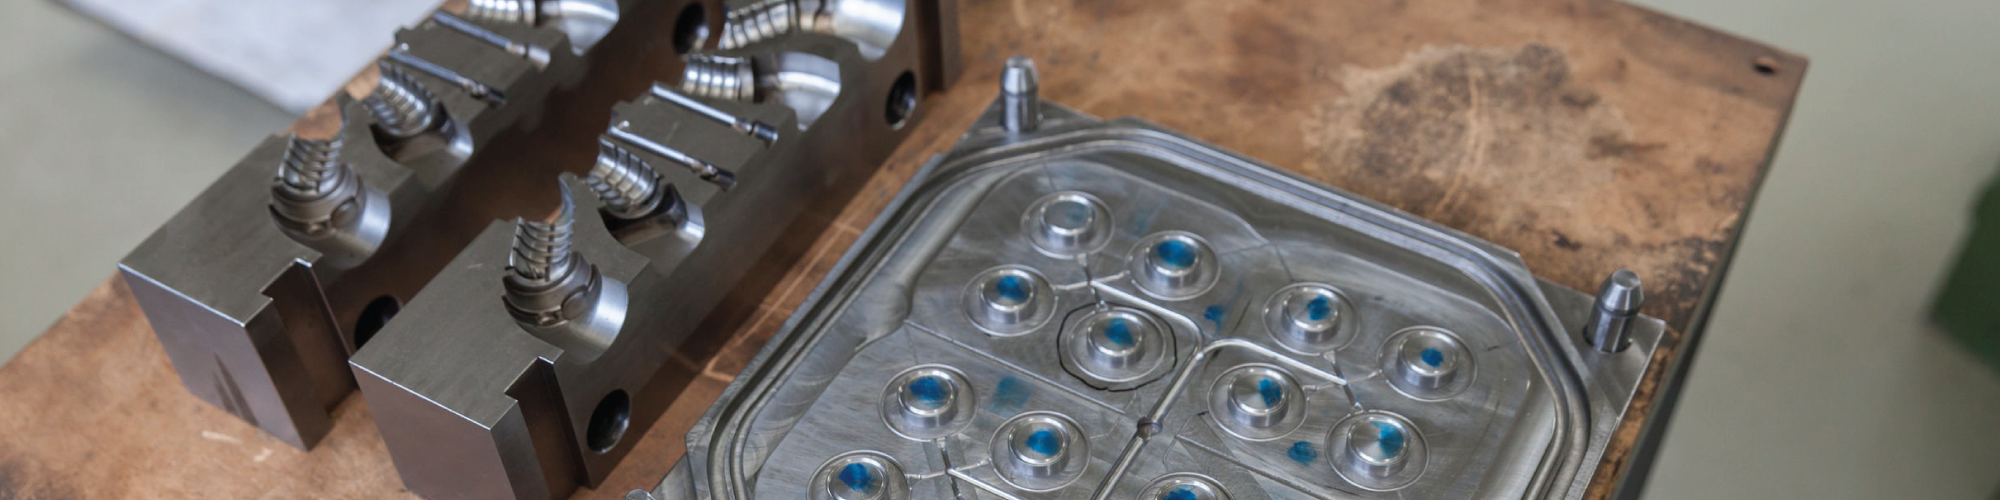
Infusion shaping is a typical assembling process used to make segments made of metals, polymers, glasses, desserts and different materials. Pellets of material are liquefied and after that infused at high weight into a mold that will set to frame the coveted part. Infusion shaping is utilized to deliver things, for example, kitchen utensils, cultivate instruments, housings for hardware and some more.

Infusion shaping deformities

Deformities in infusion shaped items can by and large be ascribed to issues in one of the three ranges:

  • The crude materials bolstered into the form
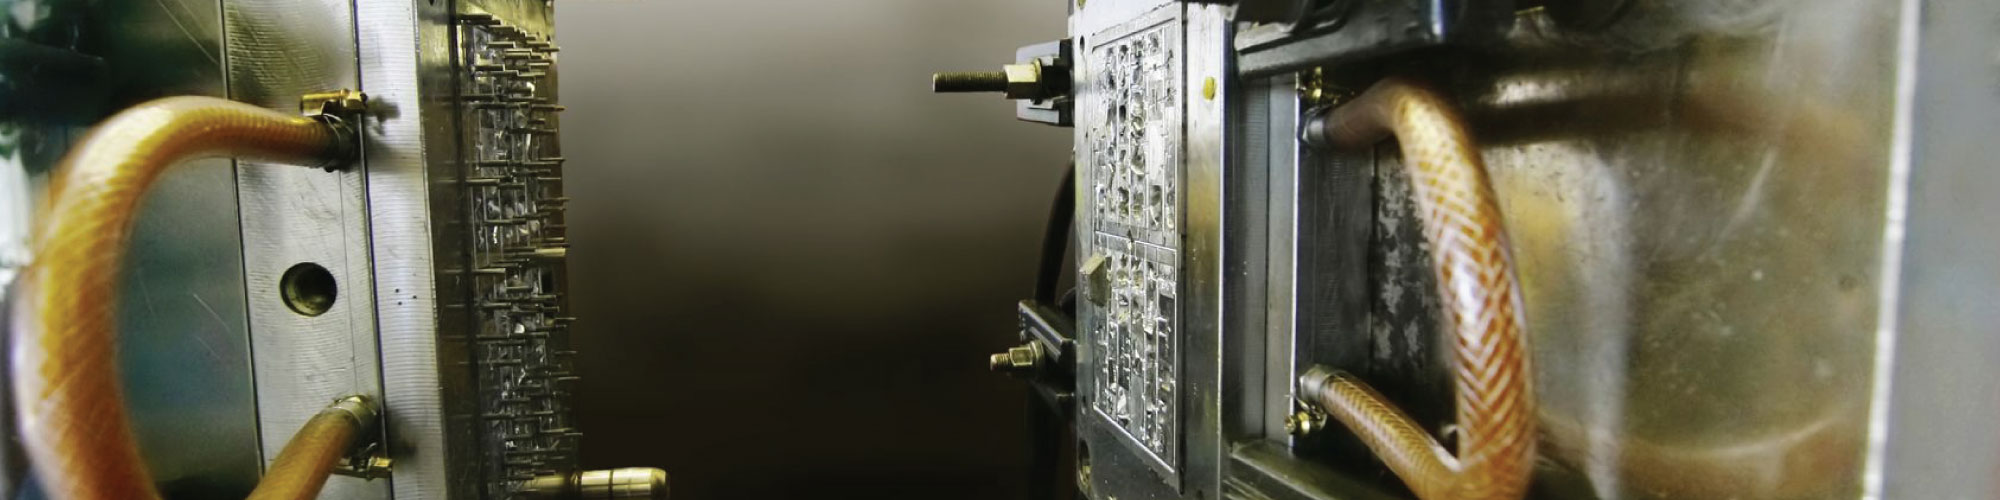
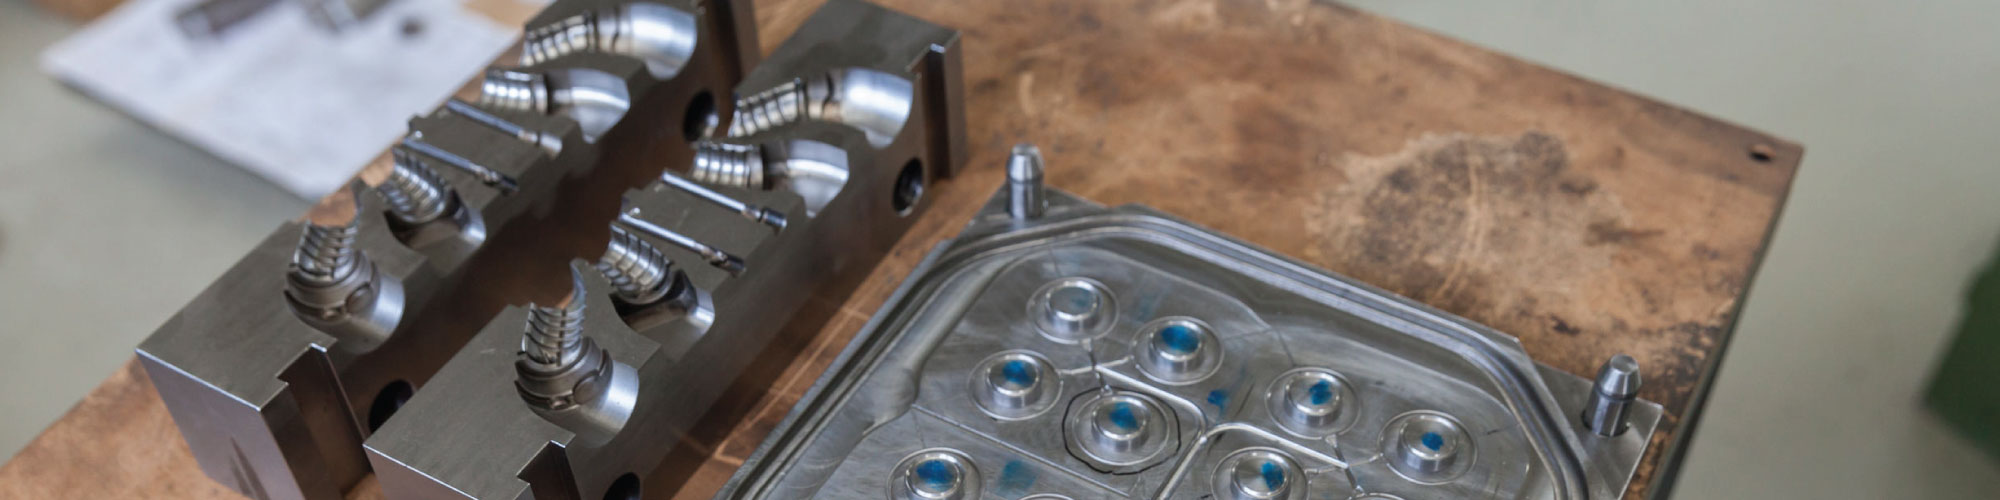
  • The form, or
  • The infusion forming process, (for example, the settings of the machine)

Here are five normal infusion shaping imperfections to keep an eye out for while reviewing infusion formed items, what the causes are and how you can dodge them:

1. Stream marks

Stream marks show up as a wavy pattern for the most part on smaller areas of the shaped segment. Liquid plastic, for instance, cools rapidly amid the infusion procedure and stream marks are clear when the infusion speed is too moderate. The plastic turns out to be somewhat strong and sticky while as yet topping off the form, causing the wave example to show up.

To evade this, the producer can expand the:

  • Injection speed
  • Nozzle breadth
  • Cylinder temperature, and additionally
  • Injection weight

For item review, stream imprints may be viewed as “minor” infusion forming absconds if unobtrusive and not on a noticeable piece of the thing. You should seriously think about a stream stamp to be a “noteworthy” imperfection on the off chance that it influences usefulness of your item or darkens a logo.

2. Short shot

A short shot is a fragmented segment which is caused by the stream solidifying off before the form is totally filled amid the infusion procedure. There are a couple of conceivable reasons why infusion may leave a void in the shape, for example,

  • Flow limitations, more often than not because of mind boggling or solidified stream channels
  • Hesitation amid infusion, or
  • Inadequate venting causing a development of pneumatic force against the stream

You may see short shot in your plastic show as deficient compartments in plastic racks. A basic illustration is short or missing prongs on a plastic fork. Short shots are an average significant imperfection in infusion formed items.

Tending to short shots in assembling will rely upon the reason. On the off chance that the reason is identified with fill rate or wavering, raising the infusion weight, speed or temperature are conceivable cures. In the event that there is stream confinement, you may need to clear solidified stream channels or update the form. Also, insufficient venting is best tended to by including air vents close to the finish of the influenced channel(s).

3. Burn marks

Burn marks in the plastic show up as dark or dull red staining when the material consumes amid infusion. Normally considered a minor imperfection, a burn stamp amid the infusion procedure may be caused by at least one of the accompanying:

  • Overheating because of caught air
  • Excessive infusion speed, and
  • Excessive dissolve temperature

In the event that you see consume stamps in your plastic parts, there are a couple of conceivable remedial moves to make in the assembling procedure. Shortening the process duration, bringing down the temperature as well as backing off the infusion speed may avert additionally consuming. Caught air can be settled by guaranteeing satisfactory gas vents and entryway sizes.

4. Streak

Streak is an abundance of filler material that can show up as a thin lip or distension at the edge of a part. This overabundance material shows up in light of the fact that material has streamed outside of the proposed stream channels between the plates. Streak is for the most part inconspicuous however may be viewed as a noteworthy imperfection if especially evident on an item. Some regular reasons for streak include:

  • Poorly fitting or composed trim plates
  • Insufficient clip drive, and
  • Improper ventilation
  • Molds ought to be verified that their plates fit together appropriately and just enable material to stream in the channels. Clasping power may should be expanded, since this drive shields the material from streaming outside the stream channels. Finally, air vents may should be added to keep pneumatic stress from shaping and opposing the stream.

    Unless the glimmer is significant to the point that tooling should be revised, trimming the segments is typically enough to guarantee these are not obvious on the completed item. On the off chance that inadmissible glimmer is showing up on your items, you can request that your provider ensure it’s trimmed before delivery.

    5. Staining

    Staining is an infusion shaping deformity that shows unspecified streaking or shading in an infusion formed item. Staining is ordinarily because of one of two causes:

    • Improper blending of the masterbatch, the added substance utilized for shading material, or
    • Impurities acquainted with the material amid the embellishment procedure infusion Molding Defects
    • In the event that the masterbatch is not uniformly blended, you may see a dash of shading at last item. What’s more, you can have polluting influences acquainted with a shape if the container, material nourish range or form plates of a machine are not cleaned legitimately before generation. To maintain a strategic distance from this issue, guarantee that the maker is appropriately cleaning the infusion shaping machine before delivering your things.

      Contingent upon seriousness, staining could constitute either a minor or a noteworthy deformity. What’s more, there is no real way to evacuate this imperfection through revise of the completed item.

      Conclusion

      Since you have a thought of a portion of the normal infusion shaping deformities to pay special mind to, you’ll be in a superior position to survey the nature of your own items. You’re better arranged to survey a review report of your item or investigate the item yourself.

How To Fix Injection Molding Defects

How To Fix Injection Molding Defects

Even though society as we know it right now would be radically different without injection molding, it’s a process few people would stop to give any thought. But in truth, injection molding is a fascinating process that involves involvement from highly skilled professionals working in a variety of different fields.

Injection molding combines art and design with science, technology and precision engineering. And while the basic idea of injecting molten plastic into a shaped cavity for mass production seems simple enough, the process is reasonably delicate, and requires special care attention along the way to ensure the desired results. Troubleshooting can easily occur if a pivotal part of the process isn’t being done right, and this will usually show up on the molded parts as defects.

The good news is that defects in your molded parts don’t necessarily indicate any significant issues with your molds. It’s completely possible for a good mold to produce bad parts when parts of the molding process aren’t being performed correctly.

Flow Lines

Flow lines show up as darker streaks in the molded part. As the name suggests, the patterns of these lines look similar to the pattern you’d expect the molten plastic to flow in, with darker lines occurring close to where the mixture enters the mold.

Assuming your mold is in good shape, the best advice for preventing flow lines is to increase the rate at which plastic flows into the mold a bit. Increasing the injection speed can prevent the mixture from solidifying at different times during the process, which should help the get rid of the lines.

However, if using the optimal injection speed doesn’t change the problem, it might be best to have your mold inspected. Flow lines are more like to occur in areas where the wall thickness isn’t equal throughout. A flow gate located in the wrong area of a mold can also cause these kinds of problems.

Weld Lines

Weld lines look a bit like seams in a garment. They’re often visible in areas around a shaped area of your molded part. And these lines are, in fact, somewhat like the injection molding version of clothing seams. They’re caused when molten plastic flowing into the mold from two different directions of flow come together.

Once again, it’s worthwhile trying to increase the injection speed to prevent this problems from occurring. You can also look into using a different kind of plastic.

If all else fails, you might be able to have your mold adjusted to change the flow pattern of the molten plastic in the mold.

Surface Delamination

Like most plastic molding defects, surface delamination is very noticeable problem. In this case, your molded prototype parts will have layers on the surface instead of appearing smooth. These layers are bad news for the part, as they easily peel away.

One of the main causes of surface delamination is the presence of a foreign material, or contaminant, that cannot mix with your plastic. This contaminant then causes the plastic to separate in the way you see with this molding defect.

A good call for preventing surface delamination is to use only as much mold release agents as is absolutely necessary. However, if your molds are poorly designed, or have faulty ejection mechanisms, your best choice is to have the mold inspected and adjusted by a qualified mold professional.

Short Shot

Short shots might cause a bit more panic for some molders. In the case of a short shot, your molten plastic will actually fail to fill up the entire mold cavity during the injection process. This will cause your molded part to be incomplete when it’s ejected, as there will be missing areas in your part where it didn’t flow into the mold.

Your first choice in fixing this problem would be to reconsider the plastic you’re using. If you’re using the wrong material, it can actually set before filling the mold cavity, meaning never flow into the parts of the mold that would usually be filled last. Increasing the temperature can also help to prevent your plastic from solidifying prematurely.

Another cause for this problem can be that your mold isn’t allowing gas to effectively escape from the mold cavity as the molten plastic flows in. This trapped gas will be condensed in the mold cavity, creating too much pressure to allow the molten plastic to flow into that area.

These are just some of the problems you might experience during molding. When trying to successfully create your first molded prototype, you’ll soon see that injection molding isn’t as simple as getting your equipment set up and starting the process. A lot of factors will contribute to creating a molded part that lives up to your expectations.

Your team of professionals will arguably play the biggest role in whether or not your part turns out as you planned. A team of qualified professionals should be able to help you with choosing the right plastics and injection speeds to mold quality parts.

But having the best team behind you is essential in all stages of part production. Including the very first stages of designing and building your mold. If your mold isn’t functioning properly, nothing else you can do will compensate for this malfunction. At Quality Mold Shop, we can help you fix and adjust dysfunctional molds, as well to design molds specifically to avoid common part defects.

The Benefits of Replacing Metals with Plastics

The Benefits of Replacing Metals with Plastics

Although metal-to-plastic transformation was presented in the 1950s, with the invention of engineering-grade resins, numerous producers today are new to the benefits of this adaptable method.

As diverse advanced, cost-effective plastics are being produced in today’s moving scene, numerous ventures are accepting the advantages of supplanting metal parts with injection molded plastic. Truth be told, most organizations can anticipate that metal-to-plastic change to bring about cost savings of 25-50%.

With high quality, predictable dependability, and the capacity to be made to an indistinguishable tight resilience from metal, plastic parts can offer various advantages to organizations over a wide range of businesses.

The Advantages of Plastic over Metal

The same number of businesses turn out to be progressively mindful of the advantages of metal-to-plastic change, high-volume injection molding is rapidly turning into the method of choice for part manufacture.

Plastic parts offer a few all inclusive advantages over metal, including:

  • Can have higher rigidity versus many sorts of metal
  • Reduced part weight
  • Reduced fabricating costs
  • Superior design adaptability
  • Reduced waste
  • Faster fabricating times
  • Easy adherence to different administrative compliances
  • Lower bundling and transporting costs
  • Up to six times longer life
  • Increased corrosion resistance
  • Repeatable, unsurprising assembling

Other than diminishing weight and enhancing general part quality and erosion resistance, plastic-to-metal change likewise takes into consideration the combination of various metal parts into a solitary plastic part. Also, besides offering meet strength and taking into consideration an indistinguishable tight resilience from metal, plastic parts require less auxiliary operations, in this way saving money on time and expenses.

With specific plan strategies, plastic parts can really be made to have higher-quality physical and synthetic properties than metal.

Using Plastic Parts to Cut Costs

As mentioned, plastic-to-metal conversion can result in savings of 25-50%. This is due to several factors: the ability to replace multiple metal parts with one plastic part and the subsequent elimination of fastener and assembly needs, as well as the ability to add colors to plastic melts and the resultant elimination of painting or laser marking processes.

Besides saving on costs, however, using plastic can significantly improve the quality of parts. Plastic can optimize part quality in several ways, including through:

Best 10 Injection Molding Defects And How To Fix Them

Best 10 Injection Molding Defects And How To Fix Them

Making injection models is both a craftsmanship and a science. Abnormal amounts of specialized skill and tender loving care are required to keep little errors from costing organizations huge cash with ass-production of novel parts.

Counteracting such a situation is about exceptionally capable design. This article discusses some of the molding defects that can occur in a part during injection molding, and ways to fix and avoid them. Design shortcomings we will discuss include:

  • Flow Lines
  • Sink Marks
  • Vacuum Voids
  • Surface Delamination
  • Weld Lines
  • Short Shots
  • Warping
  • Burn Marks
  • Jetting
  • Flash

Most mistakes are caused by nescient personnel without the necessary experience or the right tools at their disposal. Conversely, creative solutions and ingenuity abound in personnel with the right experience and the correct combination of hardware and software. Finding the right team of people with relevant expertise is the most important part of the process.

Flow Lines

Description: Flow lines are streaks, patterns, or lines – ordinarily off-toned in shading – that appear on the prototype part as an outcome of the physical path and cooling profile of the liquid plastic as it flows into the injection mold tooling cavity. Injection molded plastic starts its adventure through the part tooling by means of a passage area called a “door.” It then courses through the device hole and cools (in the end solidifying into a strong solid).

Causes: Flow line deformities are created by the differing speed at which the liquid plastic streams as it alters course through the forms and curves inside the shape device. They likewise happen when the plastic courses through areas with changing wall thickness, or when the injection speed is too low making the plastic harden at various velocities.

Remedies:

  • Increase injection speeds and pressure to the ideal level, which will guarantee the cavities are filled appropriately (while not enabling the liquid plastic time to begin cooling in the wrong spot). The temperature of the liquid plastic or the mold itself can likewise be lifted to guarantee the plastic does not chill off adequately to bring about the imperfection.
  • Round corners and areas where the wall thickness changes to keep away from sudden alters in course and stream rate.
  • Find the entryway at a spot in the apparatus depression with thin walls.

Sink Marks

Description: Sink imprints are little holes or miseries that create in thicker territories of the injection mold when shrinkage happens in the inward segments of the completed item. The impact is to some degree like sinkholes in geology, yet brought about by shrinkage instead of disintegration.

Causes: Sink imprints are frequently brought on when the cooling time or the cooling system is lacking for the plastic to completely cool and cure while in the shape. They can likewise be brought on by deficient weight in the hole, or by an inordinate temperature at the entryway. All else being equal, thick sections of the injection molded part take longer to cool than thin ones and so are more likely to be where sink marks are located.

Remedies:

  • Form temperatures ought to be brought down, holding pressure expanded, and holding time drawn out to take into consideration more satisfactory cooling and curing.
  • Decreasing the thickness of the thickest wall areas will likewise guarantee speedier cooling and help diminish the probability of sink imprints.

Vacuum Voids

Depiction: Vacuum voids are pockets of air caught inside or near the surface of an injection mold.

Causes: Vacuum voids are regularly brought on by uneven solidification between the surface and the internal areas of the model. This can be disturbed when the holding pressure is insufficient to condense the molten plastic in the mold (and thereby force out air that would otherwise get trapped). Voids can also develop from a part that is cast from a mold with two halves that are not correctly aligned.

Remedies:

  • Find the entryway at the thickest piece of the trim.
  • Change to a less thick plastic. This will guarantee that less gas is caught as air can escape all the more quickly.
  • Increment holding weight and in addition holding time.
  • Guarantee that form parts are impeccably adjusted.

Surface Delamination

Description: Surface delamination is a condition where thin surface layers show up on the part because of a contaminant material. These layers seem like coatings and can for the most part be peeled off (i.e. “delaminate”).

Causes: Foreign materials that find their way into the liquid plastic separate from the completed item on the grounds that the contaminant and the plastic can’t bond. The fact that they can’t bond not only has an effect on the presence of the mold additionally on its quality. The contaminant acts as a localized fault trapped within the plastic. An over-dependence on mold release agents can also cause delamination.

Remedies:

  • Pre-dry the plastic appropriately before embellishment.
  • Increment the form temperature.
  • Smooth out the corners and sharp turns in the form configuration to evade sudden changes in liquefy stream.
  • Concentrate more on the discharge component in the form configuration to decrease or dispense with the reliance on shape discharge operators.

Weld Lines

Description: Weld lines are in reality more like a plane than a line that shows up in a section where liquid plastics meet each different as they spill out of two distinct parts of the shape.

Causes: Weld lines are brought on by the deficient holding of at least two stream fronts when there is fractional hardening of the liquid plastic.

Remedies:

  • Raise the temperature of the mold or liquid plastic.
  • Increment the injection speed.
  • Adjust the design for the flow pattern to be a single source flow.
  • Switch to a less viscous plastic or one with a lower melting temperature

Short Shot

Depiction: As the term suggests, short shots can be portrayed as a circumstance where a molding shot misses the mark. This means that the molten plastic for some reason does not fully occupy the mold cavity or cavities, resulting in a portion where there is no plastic. The finished product becomes deficient because it is incomplete.

Causes: Short shots can be created by various things. Erroneous alignment of the shot or plasticizing limits can bring about the plastic material being insufficient to fill the depressions. In the event that the plastic is excessively thick, it might cement before completely involving every one of the holes and result in a short shot. Deficient degassing or gas venting systems can likewise bring about short shots since air is caught and has no real way to get away; plastic material can’t possess the space that air or gas is occupying.

Remedies:

  • Select a less viscous plastic with higher flowability. This plastic will fill the hardest-to-reach cavities.
  • Increase mold or melt temperature so as to increase flowability.
  • Account for gas generation by designing the mold so that gas is not trapped within the mold and is properly vented.
  • Increase the material feed in the molding machine or switch to a machine that has a higher material feed in the event that the maximum material feed has been reached.

Warping

Description: Warping (or warpage) is the misshaping that happens when there is uneven shrinkage in the diverse parts of the formed segment. The outcome is a curved, uneven, or twisted shape where one was not planned.

Causes: Warping is normally brought on by non-uniform cooling of the form material. Diverse cooling rates in various parts of the shape make the plastic cool distinctively and in this manner make inside burdens. These burdens, when discharged, prompt distorting.

Remedies:

  • Ensure that the cooling time is sufficiently long and that it is slow enough to avoid the development of residual stresses being locked into the part.
  • Outline the mold with uniform wall thickness thus that the plastic streams in a solitary course.
  • Select plastic materials that are less inclined to contract and distort. Semi-crystalline materials are for the most part more inclined to twisting.

Burn Marks

Depiction: Burn imprints are stains, normally rust hued, that show up on the surface of the injection models.

Causes: Burn imprints are brought about either by the degradation of the plastic material because of extreme warming or by injection speeds that are too quick. Burn marks can likewise be brought about by the overheating of caught air, which cuts the surface of the shaped part.

Remedies:

  • Lessen injection speeds.
  • Streamline gas venting and degassing.
  • Reduce mold and melt temperatures.

Jetting

Depiction: Jetting alludes to a circumstance where liquid plastic neglects to adhere to the form surface because of the speed of infusion. Being liquid, the liquid plastic sets in an express that demonstrates the wavy folds of the fly stream on the surface of the infusion shaped part.

Causes: Jetting happens for the most part when the liquefy temperature is too low and the consistency of the liquid plastic turns out to be too high, in this manner expanding the resistance of its course through the shape. At the point when the plastic interacts with the shape dividers, it is quickly cooled and the consistency is expanded. The material that courses through behind that thick plastic pushes the gooey plastic further, leaving scratch blemishes on the surface of the completed item.

Remedies:

  • Increment form and dissolve temperatures.
  • Increment the extent of the entryway so that the infusion speed turns out to be slower.
  • Improve entryway configuration to guarantee satisfactory contact between the liquid plastic and the shape.

Flash

Depiction: Flash is a molding imperfection that happens when some liquid plastic breaks from the form hole. Commonplace courses for escape are through the separating line or ejector stick areas. This expulsion cools and stays appended to the completed item.

Causes: Flash can occur when the mold is not clamped together with enough force (a force strong enough to withstand the opposing forces generated by the molten plastic flowing through the mold), which allows the plastic to seep through. The use of molds that have exceeded their lifespan will be worn out and contribute to the possibility of flash. Additionally, excessive injection pressure may force the plastic out through the route of least resistance.

Remedies:

  • Increase the clamp pressure to ensure that the mold parts remain shut during shots.
  • Ensure that the mold is properly maintained and cleaned (or replaced when it has reached the end of its useful lifespan).
  • Adopt optimal molding conditions like injection speed, injection pressure, mold temperature, and proper gas venting.

A large number of the defects mentioned above can be prevented in the design process by incorporating proper tooling design into the iterative process. Using moldflow software like Solidworks plastics will help you identify ideal gate locations, anticipate air pockets, flow or weld lines, and vacuum voids. Most importantly, it will help you design solutions to these problems ahead of time, so that when it comes to production you do not have to worry about the defects costing you money.

How to Avoid Common Injection Molding Defects

How to Avoid Common Injection Molding Defects

When working with any assembling procedure, various deformities unique to that procedure ordinarily happen. This is true across many processes and industries, including plastic injection molding and high volume injection molding.

There are a few normal infusing forming abandons; be that as it may, an injection molder who is cautious about quality, similar to our group at Quality Mold Shop, will have the capacity to deal with these injection molding deformities, limiting or dispensing with them all together.

These six most common plastic part defects can all be traced to one of three sources: the resin or additives used, the injection molding process, or the mold itself.

Resin and Additive-Caused Defects

Two common defects caused by issues with the resin or resin additives used during injection molding are delamination and discoloration.

Delamination

Delamination, when a completed part has a layer of flaky material at the surface, hurts both aesthetic of your part and its strength. Created by humidity contamination of the resin pellets or by other defilement of the dissolved resin with a different resin, or by discharge specialists in the mold, delamination is the aftereffect of the resin being kept from bonding.

Various strategies, both basic and more mind boggling, can be utilized to counteract delamination. On the off chance that dampness is the issue, pre-drying the resin pellets or expanding mold temperature will offer assistance. In the event that form discharge specialists are the cause, a mold redesign that places more focus on the ejection mechanism will help to eliminate mold release. If it is caused by cross-contaminated resins, that will need to be replaced with virgin material.

Staining

Staining is basically when a completed part is not the same as proposed color. Brought on most usually by extra pellets in the container, excessively hot barrel temperature or remaining resin in the feed zone, the issue can be tended to by altogether flushing the container and bolster zone of a machine in the middle of procedures, subsequently avoiding staining as is normally done. Purging compound can likewise be successful to expel undesirable shading or resin.

Process-Caused Defects

In spite of constant advances in injection molding innovation, process-derived injection molding defects still occur. Two of the most common are burn marks and flow marks.

Burn Marks

Burn imprints are surface imprints, in some cases progressing to debased plastic, that are brought about by either caught air which ends up overheated or genuine resin that overheats. There are three approaches to keep away from burn marks: diminish resin injection speeds, which will bring down the likelihood of air getting caught; include or optimize venting and degassing systems; or reduce the mold and/or melt temperature.

Flow Marks

Flow marks are lined patterns, regularly wavy, or discoloration on a part surface. They are most generally created by resin cooling too rapidly or incorrect gate location. In the most ideal situation, flow marks can be wiped out by expanding injection speed and weight, which will guarantee uniform filling and cooling. In the direst outcome imaginable, a mold upgrade with an accentuation on maintaining a strategic distance from sudden stream heading changes and entryway area might be vital.

Mold-Caused Defects

Flash and short shots are two of the more typical injection molding imperfections brought on by mold outline or upkeep issues.

Flash

Sometimes known as burrs, flash is the occurrence of thin, wafer-like protrusions on a finished part caused when melted resin escapes the mold cavity. Most common along the parting line or up an ejector pin, flash can be caused by excessive injection speed or pressure, in which case the fix is a simple reduction. More often flash is due to poorly designed or severely degraded molds, in which case a redesign or retooling is required. Flash can also be caused by too high of a mold temperature and excessive barrel heat.

Short Shot

A short shot is when a dose of resin misses the mark regarding filling the shape. It can be brought about by endeavoring to utilize the wrong resin type or by poor process settings, yet is most normally created by door blockages or too little of an entryway distance across, a typical issue because of too low weight or insufficient warmth. On the off chance that a higher soften file resin or expanded dissolve temperature doesn’t take care of a short shot issue, you may need to upgrade the runner framework to advance stream.

Plastic Injection Molding vs. 3D Printing

Plastic Injection Molding vs. 3D Printing

3D printing is a relatively new technology, and with its rise, manufacturers of plastic goods are excited to explore the possibilities of manufacturing using the 3D printing process. But what are the capabilities of 3D printing? Can 3D printing replace injection molding entirely as a way of producing plastic parts?

This is where you have to be careful. While 3D printing is a brilliant and promising technology that has very useful applications in the manufacturing process, it’s not quite able to replace the standard injection molding process just yet. Learning about the differences between plastic injections molding and 3D printing can help you to get the most out of each process.

What Is 3D printing?

3D printing is basically what it sounds like. During the manufacturing process, a special 3D printing machine is used to manufacture a plastic part through printing layers of the material onto the part until it’s complete. As with regular printing you’d do at home, the 3D printer is linked to a computer with a finished plan of what the part should look like once it’s done.

The benefit 3D printing has over injection molding – and the reason why many manufacturers are interested in whether or not 3D printing can replace plastic injection molding – is because (unlike plastic injection molds) 3D printing machines don’t have to be custom made for every part. What this means is that one machine can produce a relatively large amount of differently shaped parts.

With plastic injection molds, only one shape can be made by one mold, and that shape is determined by the mold cavity, of course. For different shapes, you need different molds, and having a plastic injection mold designed and made is rather costly.

This once again shows why manufacturers would be interested in a tool that can be used for any part without having to be specially made. It seems exciting, and like it can open up the world of manufacturing to brand new possibilities that would’ve been too costly in the past.

But how does injection molding really compare to 3D printing? Can manufacturers replace their injection molds with 3D printers now? Are 3D printers the future of manufacturing in the plastic industry?

Injection Molds vs 3D Printers

It’s true that 3D printing is a promising and exciting new development in the manufacturing industry. It’s also true that 3D printing can save manufacturers money when it comes to producing their final products. But currently the 3D printing process is just not sophisticated enough to replace plastic injection molding entirely.

The best use of 3D printing is for prototyping parts. You can save enormous amounts of money by having prototypes produces through 3D printing rather than injection molding while you’re still in the phase of designing a product that you aren’t mass-producing yet. This is especially the case if you only want one or two prototypes.

But apart from helping you save money on producing a small amount of parts for prototyping, 3D printing loses its appeal once you want to mass-produce a part.

The cost per part for 3D printing will be much lower than that of injection molding initially, but the more parts you produce, the smaller the price gap between 3D printing and injection molding will become. Eventually, the price per part will break even, and after that injection molding will once again be cheaper than 3D printing.

The number of parts you can produce before reaching the break-even point where injection molding and 3D printing costs the same per part will depend on the part you want to produce. But it can be surprisingly low sometimes, so you should look into the exact costs before assuming 3D printing will be cheaper.

Injection Molding Benefits

So, the relatively simple process of molding can still be cheaper than using clever computer software and a 3D printer. That comes as little surprise. But plastic injection molding is still superior to 3D printing in many other ways.

For instance, the molding process still has a much faster turnaround than that of printing. Which makes sense, since parts are produced through molding them in one go, rather than one layer at a time.

This is one reason why 3D printing still fails to be practical for mass-production. Compared to injection molding, it is painstakingly slow and you’d need a whole lot of printers to keep up with one single injection mold in terms of parts per hour.

But 3D printing is also less versatile. You’re restricted when it comes to what polymers you can use, so producing certain things through printing is literally still impossible in some cases. Meaning that you might not even be able to use 3D printing as a practical, cost-effective alternative for prototyping some parts.

And lastly, the versatility of injection molding allows you to create products of a higher quality.

So while 3D printing is exciting, it’s still far behind plastic injection molding. The technology will need to be improved to make it faster, more versatile and cost-effective for mass-production before it can realistically be used to manufacture high quality plastic parts. In the meantime, manufacturers should feel free to look into 3D printing for prototyping a small number of parts whenever possible.

Types of Plastic Molding

Types of Plastic Molding

Chances are, you’ve seen various videos on YouTube about how different everyday products are made. For a surprisingly large amount of different products, there’s some kind of molding involved in the manufacturing process. Even loaves of bread are baked in bread pans to give them a shape. And most candies – whether chocolate bars or jelly babies – are poured into molds of some sort.

Molding is a quick and convenient way to reproduce the same shape over and over while getting the same result every time. Because if this, it’s the most popular way of producing plastic parts. In the modern world, plastic is all around us. From children’s toys and kitchenware, to vehicles and medical equipment.

With the wide variety of uses plastic has, there are many things to consider during the process of designing parts. Not only will you have to choose the right polymer to ensure optimum part performance, you’ll need to know about different injection molding techniques that will ultimately shape your polymer into a usable plastic part.

How to Design a Plastic Product

Assuming you’re starting from scratch, with nothing but an idea for a plastic product you’d like to create in mind, there are a couple of things you should know about the creation of plastic products:

  • It’s good to have a design on hand for any product you want to make, but ultimately, you’ll have to get engineers and professional designers involved somewhere during the process.
  • 3D printing is a great way to help you create a cost effective prototype of any product you wish to create. Because 3D printing doesn’t require a specially designed mold, it’s easy to use this method without blowing the bank. However, 3D printing fails to be a viable long-term option for part production, as it’s not very versatile and takes much longer.
  • If you need to have a plastic mold specially designed and made in order to produce your product parts, you’re looking at a hefty sum of upfront investment. Plastic molds are very specialized pieces of precision-engineered equipment. That said, a good mold can complete 500,000-2,000,000 cycles in its lifetime, depending on what kind of mold you’re looking at.

With so many plastic products on the market, many people might not realize the sheer amount of work and dedication that goes into designing and creating these products.

With that said, let’s have a look at some of the molding processes used to create plastic parts.

Injection Molding

To explain injection molding simply, it’s the process where molten plastic is injected into a mold, then left to cool. Once the plastic has cooled, the plastic part is ejected and the process is repeated.

Plastic injection molds usually consist of two halves. Think about these halves as two halves of a hollow egg shell – when pressed tightly together, this shell with form a cavity into which the molten plastic can be poured. Obviously the mold won’t have an egg-shaped cavity unless you aren’t trying to mold egg shapes, though. The cavity will be shaped like whatever part is being produced.

Plastic injection molding is incredibly versatile, and is used to produce a large variety of differently shaped parts.

Rotational Molding

Rotational molding is mostly used to create parts that are hollow on the inside.

The process of rotational molding uses centrifugal force to form parts. During the process, liquid or powder-form resin is placed into a mold. The heated mold is then rotated, causing the resin to evenly coat the inside of the mold.

Blow Molding

Things like plastic bottles (like the ones in which soft drinks are often sold) are usually made using the blow molding process.

Like with most other forms of plastic molding, there’s a mold shape that serves as the “shell” of the shape you want to produce. But unlike with injection molding, the plastic isn’t simply injected into the mold. Instead, the plastic blown into the mold shape by filling it with air, much like when you blow up a balloon. As air is blown into the plastic, it takes the shape of the mold it’s blown into.

Compression Molding

With compression molding, the plastic is poured into a mold. Different parts of the mold then compress the plastic so that it’s literally squeezed into shape. This produces strong parts, and so the process is often used in the automotive industry.

Extrusion Molding

The basic concept behind extrusion molding is that the plastic is squeezed into a long cavity to shape it. It’s basically like if you were to squeeze cookie dough into a round, plastic pipe. You’d be left with cookie dough in a long, round cylindrical shape. If the pipe where square, you’d have cookie dough in a long, rectangular kind of shape.

This is the basic concept behind extrusion molding. And so this manufacturing process is used mostly to make long, cylinder-type shapes like pipes, for instance.

Those are just basic explanations of the main processes used to mass produce plastic parts. In some cases, a single plastic product will consist of different parts, and these different parts might be produced using different molding processes.

Tips for Transferring Your Injection Molded Tooling for Manufacturing

Tips for Transferring Your Injection Molded Tooling for Manufacturing

Transferring your molds to another merchant to run creation can be an overwhelming undertaking. This can be a muddled, once in a while unnerving choice that can be characteristically pervaded with worry because of the various things and procedures to be considered.

Any potential injection molder needs to demonstrate its money related security as an organization before being picked as the successor in getting your tools and running production. Likewise – be sure beyond a shadow of a doubt your picked infusion decay has a recorded apparatus exchange system.

Tool exchange methodology needs to incorporate each progression the new seller will take to guarantee the smoothest apparatus exchange – one that truly restricts any loss of creation.

How to Safely Support Tool Transfer of Injection Molding Tooling

It’s the duty of your new infusion disintegrate to build up your device exchange group. This group needs to comprise of and be set up by;

  • Agents from every single proper office
  • All staff from building through generation who should be advised of your tooling task to realize what is normal before the instrument touches base at their office

Any applicable data about the apparatuses will be given to the new merchant for legitimate assessment and review of the devices. This data incorporates:

  • Drawings
  • Shape details
  • Part data
  • Generation data
  • Quality data and any required esteem included data or helper gear

Continuously talk about venture courses of events, desires and recurrence of venture updates with your infusion decay right on time in the instrument exchange prepare so you stay on top of it at all circumstances.

Confirm Personalized Service

Your apparatus exchange group ought to work eagerly with a specific end goal to bolster and guarantee brilliant principles for your plastic parts are accomplished. This will incorporate;

  • Plan of Experiment
  • Finish Process Validation
  • Creation Realization Process
  • Approved ERP System
  • FMEA
  • Capacities Studies
  • Improvement of Custom Control Protocols
  • Accomplish dock-to-stock status with customers

Pick an organization with elevated requirements of incredibleness and an unmistakable duty to supportability and worker obligation. These qualities ought to be tied down in the organization’s way of life in a way that keeps them adding to and keeping up a focused industry edge.

Why To Secure Value Expansion and Evaluation for Manufacture-capacity

Keeping up fabricate capacity implies growing your esteem. This happens when the infusion decay legitimately assesses the accompanying:

  • State of the mold
  • Sap choice
  • Part geometry
  • Nature of particulars
  • Clear, reliable documentation

These assessments additionally require forthright arranging, venture, correspondence and clear ID of objectives.

Assessment and Validation of Performance

Approvals are required for successful execution assessment. The execution of FAIR’s and CAP’s assistance with approval, as well as with confirmation of part conformance and determinations.

Creation handle assessment occurs after the approval and before the new disintegrate starts to oversee and deliver the new parts.

Pick Experience for your Tool Transfer – Expert Customized Injection Molding

When you are compelled to do a major switch in assembling – it ought to go so easily you just notice the expansion in quality, meticulousness and opportuneness. Your commanded apparatus exchange ought to be completely effortless.

Best 5 Types of Plastic Molding

In today’s assembling condition, plastics are being utilized to make everything from car body parts to human body parts. Every application requires an extraordinary assembling process that can form the part in light of specifications. This article gives a short preview of the diverse sorts of trim and their points of interest and applications.

Blow Molding – Well suited for empty articles, similar to bottles

The procedure takes after the fundamental strides found in glass blowing. A parison (warmed plastic mass, by and large a tube) is swelled via air. The air pushes the plastic against the form to frame the coveted shape. Once cooled, the plastic is launched out.

The blow shaping procedure is intended to make high volume, one-piece empty articles. In the event that you have to make heaps of containers, this is the procedure for you. Blow shaping makes exceptionally uniform, thin walled holders. What’s more, it can do this economically.

Compression Molding – Well suited for bigger articles like automobile parts

The name of this trim technique says everything. A warmed plastic material is set in a warmed form and is then compacted into shape. The plastic can be in mass however regularly comes in sheets. The warming procedure, called curing, insures the final part will maintain its integrity. Similarly as with other molding techniques, once the part has been formed, it is then expelled from the mold. In the event that sheeting plastic material is utilized, the material is initially trimmed in the shape before the part is evacuated.

This strategy for molding is extremely appropriate to high-quality mixes like thermosetting gums and also fiberglass and fortified plastics. The predominant quality properties of the materials utilized as a part of pressure embellishment make it a precious procedure for the car business.

Expulsion Molding – Well suited for long empty framed applications like tubing, pipes and straws

While other forms of molding uses extrusion to get the plastic resins into a mold, this process extrudes the melted plastic directly into a die. The die shape, not a mold, determines the shape of the final product. The extruded “tubing” is cooled and can be cut or rolled for shipment.

Injection molding – Well suited for amazing, high-volume part fabricating

Injection molding is by a wide margin the most flexible of all Injection molding procedures. The presses utilized as a part of this procedure change in size and are appraised in light of weight or tonnage. Bigger machines can Injection mold auto parts. Littler machines can deliver exceptionally exact plastic parts for surgical applications. Likewise, there are many sorts of plastic pitches and added substances that can be utilized as a part of the infusion forming process, expanding its adaptability for originators and designers.

The process itself is fairly straightforward; however, there are many enhancements and customization techniques that can be used to produce the desired finish and structure. Injection molds, which are usually made from steel, contain cavities that will form the parts. Melted plastic is injected into the mold, filling the cavities. The mold is cooled, and the parts are ejected by pins. This process is similar to a jello mold which is filled then cooled to create the final product.

Custom Plastic Injection Molding

The form making costs in this strategy are moderately high; be that as it may, the cost per part is exceptionally lower. Low part cost alongside resin and finish alternatives have all added to Injection Molding ‘s ubiquity in today’s assembling scene.

Rotational Molding (Rotomolding)– Well suited for expansive, empty, one-piece parts.

This procedure utilizes high temperatures and rotational development to coat within the shape and frame the part. The steady turn of the shape makes radiating power framing even-walled items. Since it is in a perfect world suited to extensive empty compartments, for example, tanks, it is not a quick moving procedure. Be that as it may, it is an extremely sparing procedure for specific applications and can be less expensive than different sorts of embellishment. Next to no material is squandered utilizing this procedure, and abundance material can regularly be re-utilized, making it a sparing and ecologically reasonable assembling process.

Conclusion

Each sort of molding has its qualities and shortcomings. Designers and specialists need to comprehend these distinctions and the generation alternatives accessible. There are constantly a few ways to deal with a last assembling arrangement. The molding organization who counsels on a particular venture ought to have the capacity to give extra experiences into the applications and materials that are most appropriate to an individual venture.